

Konuya başlamadan önce;
Bu sistemi baya bi bir zamandır bir arkadaşım isteği üzerine kodluyordum. Sistemin son halini de çarşamba gecesi de kendi sitemden paylaştım lakin sitemdeki bana gelen bildirimde izinsiz bir şekilde sistemin paylaşıldığı bilgisini aldım. Arkadaşlar ben her zaman özgür yazılıma inanan birisiyim ama bir şey paylaşıyorsanız en azından kimin tarafından yapıldığını belirtmek zorundasınız. Bu hususta bu linkte yapılan paylaşımı
Sistem kısaca şöyle;
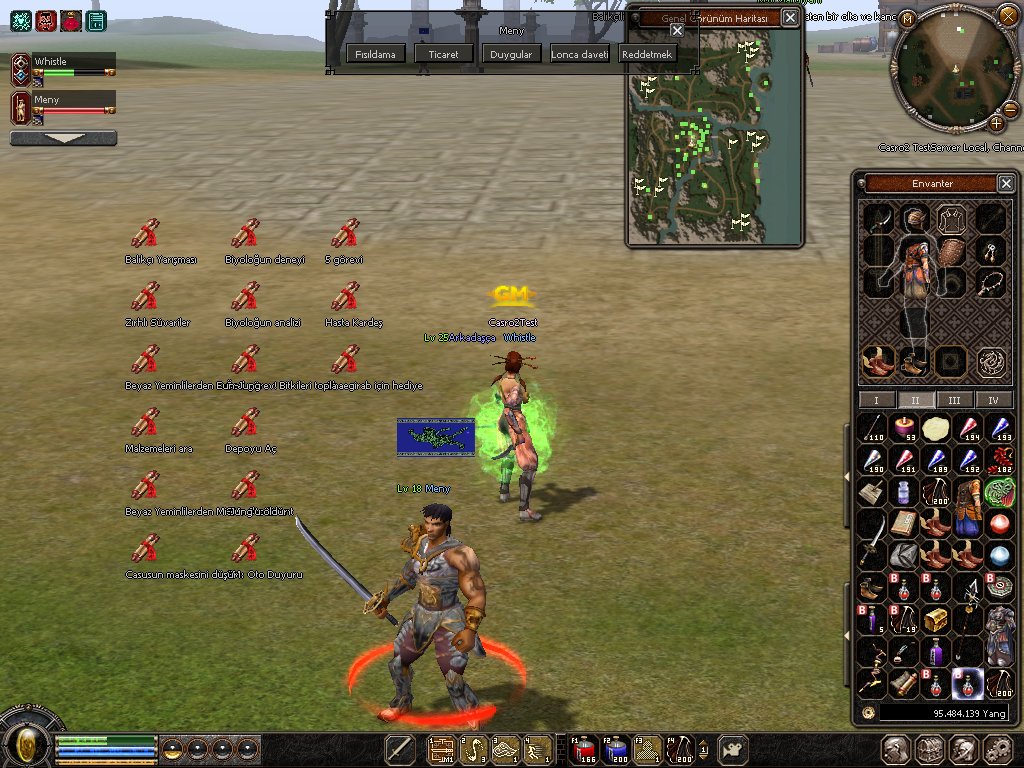
geliştirilme aşamasındaki video;
Son aşamadaki video;
Konu içinden de anlatımını yapacağım lakin ekteki dosyayı indirerek anlatımları içinde bulabilirsiniz.
Github üzerinden kodlara erişmek için:
Not: İşlemleri yapmadan önce yedek almanızı öneririm. Bu sistemi kodlarken bulabildiğim sorunları çözdüm. Bilinmeyen bir sorun oluştuğu zaman konu altından belirtirseniz seve seve düzenlerim.
Not2: Sistem sadece Python üzerinden yapıldığı için Source dosyalarına ihtiyacınız yok!
Sırasıyla şu işlemleri uygulayınız;
Root/game.py dosyasını açın ve şu kodları aratın;
Altına şu kodları ekleyin;
Aynı dosyada şu kodu aratın;
Altına şu kodları ekleyin;
Root/interfaceModule.py dosyasını açın ve şu kodları aratın;
Altına şu kodları ekleyin;
Aynı dosyada şu kodları aratın;
Altına şu kodları ekleyin;
Root/uiParty.py dosyasını açın ve PartyMemberInfoBoard sınıfı içindeki şu kodları aratın;
Altına şu kodu ekleyin;
Aynı dosyada şu kodu aratın;
Altına şu kodu ekleyin;
Aynı dosyada PartyMemberInfoBoard sınıfı içindeki __LoadBoard() fonksiyonu içindeki şu kodları aratın;
Altına şu kodu ekleyin;
Aynı dosyada şu kodları aratın;
Altına şu kodları ekleyin;
Aynı dosyada şu kodları aratın;
Altına şu kodları ekleyin;
Aynı dosyada şu kodları aratın;
Altına şu kodları ekleyin;
Aynı dosyada şu kodları aratın;
Altına şu kodları ekleyin;
Root/uiPlayerGauge.py dosyasını açın ve şu kodları aratın;
Altına şu kodları ekleyin;
Root/uiTaskbar.py dosyasını açın ve şu kodları aratın;
Altına şu kodu ekleyin;
Aynı dosyada şu kodu aratın;
Altına şu kodları ekleyin;
Aynı dosyada şu kodu aratın;
Altına şu kodları ekleyin;
Aynı dosyada şu kodları aratın;
Altına şu kodları ekleyin;
Aynı dosyada şu kodları aratın;
Aşağıdaki kodlarla değiştiriniz;
Evet arkadaşlar root kısmı bu kadar.
Şimdi uiscript kısmına geçelim.
Not: Lakin burada önemli bir nokta var. uiTasbar.py dosyasında taskbar.py dosyasını locale dosyası üzerinden çektiği için uiscript içindeki taskbar.py yerine locale/tr/ui içindekini düzenlemelisiniz eğer sizin uiTaskbar.py dosyanızda uiscript packından çekiyorsa oradaki dosyayı düzenleyin.
UIScript/taskbar.py veya locale/xx/ui/taskbar.py dosyasını açın ve en alta şu kodları ekleyin;
@sau feng tarafından bildirilen bir sorunun çözümü. Çözüm için teşekkürler.
Not: Yukarıdaki uiscript kodu bazı filesler uyumsuz olduğu için şu hatayı alıyorsanız;
Şu kodları aratın;
Altına ekleyin;
Evet arkadaşlar sistem bu şekildedir. Anlayabilmeniz için hazır kod vermiyorum.
Sistem için gerekli görseller ekteki dosyayı indirerek edinebilirsiniz.
Bu yüzden ekten verdiğim dosyayı indirip Client/ETC içindeki ymir work klasörünü oyununuzun ETC içine atın.
Not: Ekteki dosyanın içinde de anlatım mevcuttur. Konuda kodları eklerken tab ayarlarını filan düzgün yaptım. Gene de emin olmak için ekteki dosyanın anlatımını da kullanabilirsiniz.
Şimdiden herkese hayırlı olsun.
Burada diğer forum sitelerin bağlantısının paylaşılması yasak olduğu için dosyayı şuraya yükledim;
Virüs total:
Casro2 Poison Gauge Sistemi Nedir?
Metin2 özel sunucularında sunucu sahipleri ve geliştiricileri tarafından sunulan yenilikçi sistemlerden birisi olan Casro2 Poison Gauge Sistemi, oyuncuların karakterlerinin PvP mücadelelerinde daha stratejik ve dengeli bir deneyim yaşamalarını sağlar. Bu sistem, özellikle Metin2 geliştirme nişi içerisinde dikkat çeken bir özelliktir ve C++ tabanlı sunucu yapıları üzerinde geliştirilerek entegre edilir. Casro2 Poison Gauge, karakterlerin zehirlenme seviyesini görsel olarak takip edebilmelerini sağlayan bir sayaçtır. Bu sayaç sayesinde oyuncular, karşı rakibin zehir seviyesini izleyebilir ve bu bilgiye göre savaş stratejileri geliştirebilirler.
Casro2 Poison Gauge Nasıl Çalışır?
Casro2 Poison Gauge sistemi, oyuncunun karakteri bir rakibe karşı zehir saldırısı gerçekleştirdiğinde devreye girer. Zehir saldırısı sonucunda karşı rakip karakterin üzerinde bir sayaç belirir ve bu sayaç, alınan zehir miktarını ve süresini gösterir. Bu sayaç, genellikle ekranın sol üst köşesinde ya da karakterin can çubuğunun altında yer alır. Sistem, Python GUI (PyUI) tabanlı arayüzle entegre çalışarak kullanıcı dostu bir yapı sunar. Ayrıca, poison gauge değerlerine göre karakterlerin can kaybı, hız düşmesi gibi etkileri dinamik olarak hesaplanır. Bu da oyuncuların PvP savaşlarında daha dikkatli ve stratejik hareket etmelerini teşvik eder.
Casro2 Poison Gauge Sisteminin Avantajları
Casro2 Poison Gauge sisteminin en büyük avantajlarından birisi, PvP deneyimini daha derin ve taktiksel hale getirmesidir. Oyuncular, zehir seviyesini takip ederek hangi an saldırı yapması gerektiğini ya da kaçınması gerektiğini bilebilirler. Ayrıca, bu sistem sayesinde karakterlerin poison dayanıklılığı gibi yeni özellikler ön plana çıkar. Bu da Metin2 özel sunucularında karakter geliştirme sürecini daha zenginleştirir. Sunucu sahipleri, bu sistemi kullanarak oyuncuların ilgisini çekmeyi başarırlar. Özellikle C++ ile yazılmış sunucu kaynak kodları üzerinde bu sistem kolayca entegre edilebilir ve özelleştirilebilir.
Sistem Entegrasyonu ve Kurulum
Casro2 Poison Gauge sistemi, Metin2 özel sunucularında aktif hale getirilmek istendiğinde bazı önemli adımlar izlenmelidir. İlk olarak, game server source code üzerinde gerekli değişiklikler yapılmalıdır. Bu değişiklikler, poison gauge değerlerinin sunucudan istemciye aktarılmasını sağlar. Ardından, Python tabanlı UI dosyaları (uiscript) üzerinde sayaç tasarımı yapılır. Bu tasarım, oyuncunun PvP sırasında poison seviyesini kolayca takip edebilmesini sağlar. Pack dosyaları güncellenerek bu yeni arayüz sunucuya entegre edilir. Tüm bu işlemler, Metin2 geliştirme konusunda deneyimli geliştiriciler tarafından kolayca uygulanabilir.
Sonuç
Casro2 Poison Gauge sistemi, Metin2 özel sunucularında PvP odaklı oyun deneyimini ciddi anlamda geliştirir. Oyuncuların strateji geliştirmesi, rakiplerini analiz etmesi ve daha akıllıca savaşması için güçlü bir araçtır. Bu sistem, C++ ve Python tabanlı sunucu geliştirme bilgisiyle kolayca entegre edilebilir. Casro2 Poison Gauge sistemi, Metin2 özel sunucularında farklılaştırıcı bir özellik sunarak hem oyuncuların hem de sunucu sahiplerinin memnuniyetini artırır.
What is Casro2 Poison Gauge System?
The Casro2 Poison Gauge System is one of the innovative features offered by server owners and developers in Metin2 private servers, enhancing strategic and balanced gameplay in PvP encounters. This system stands out in the Metin2 development niche and is implemented through C++ based server structures. Casro2 Poison Gauge is a visual counter that allows players to track their character's poisoning level. With this gauge, players can monitor the poison level of their opponent and develop battle strategies accordingly.
How Does Casro2 Poison Gauge Work?
The Casro2 Poison Gauge system activates when a player's character inflicts a poison attack on an opponent. As a result of the poison attack, a counter appears over the enemy character, showing the amount and duration of poison received. This gauge usually appears in the top-left corner of the screen or below the character's health bar. The system works integrated with a Python-based GUI (PyUI), providing a user-friendly interface. Additionally, effects such as health loss and speed reduction are dynamically calculated based on poison gauge values, encouraging players to act more strategically during PvP battles.
Advantages of Casro2 Poison Gauge System
One of the biggest advantages of the Casro2 Poison Gauge system is its ability to make the PvP experience deeper and more tactical. Players can monitor poison levels to decide when to attack or retreat. Moreover, features like poison resistance become prominent, enriching the character development process in Metin2 private servers. Server owners successfully attract player interest by implementing this system. It can be easily integrated and customized into C++ based server source codes.
System Integration and Installation
To activate the Casro2 Poison Gauge system in Metin2 private servers, several key steps must be followed. First, necessary modifications should be made in the game server source code to allow poison gauge values to be transferred from the server to the client. Then, UI files based on Python (uiscript) are designed to display the gauge visually. This design enables easy tracking of poison levels during PvP combat. Updated pack files integrate this new interface into the server. All these processes can be easily applied by experienced developers in Metin2 development.
Conclusion
The Casro2 Poison Gauge system significantly enhances the PvP-focused gaming experience in Metin2 private servers. It serves as a powerful tool for players to develop strategies, analyze opponents, and fight smarter. Implemented with C++ and Python-based server development knowledge, this system provides a differentiating feature in Metin2 private servers, increasing satisfaction among both players and server owners.
Bu sistemi baya bi bir zamandır bir arkadaşım isteği üzerine kodluyordum. Sistemin son halini de çarşamba gecesi de kendi sitemden paylaştım lakin sitemdeki bana gelen bildirimde izinsiz bir şekilde sistemin paylaşıldığı bilgisini aldım. Arkadaşlar ben her zaman özgür yazılıma inanan birisiyim ama bir şey paylaşıyorsanız en azından kimin tarafından yapıldığını belirtmek zorundasınız. Bu hususta bu linkte yapılan paylaşımı
Ziyaretçiler için gizlenmiş link,görmek için üye olmalısınız!
Giriş yap veya üye ol.
forum yetkililerine bildirdim. Ve bir daha böyle bi terbiyesizlik olmasın diye bu sitede de paylaşma kararı aldım.Sistem kısaca şöyle;
geliştirilme aşamasındaki video;
Son aşamadaki video;
Konu içinden de anlatımını yapacağım lakin ekteki dosyayı indirerek anlatımları içinde bulabilirsiniz.
Github üzerinden kodlara erişmek için:
Ziyaretçiler için gizlenmiş link,görmek için üye olmalısınız!
Giriş yap veya üye ol.
Not: İşlemleri yapmadan önce yedek almanızı öneririm. Bu sistemi kodlarken bulabildiğim sorunları çözdüm. Bilinmeyen bir sorun oluştuğu zaman konu altından belirtirseniz seve seve düzenlerim.
Not2: Sistem sadece Python üzerinden yapıldığı için Source dosyalarına ihtiyacınız yok!
Sırasıyla şu işlemleri uygulayınız;
Root/game.py dosyasını açın ve şu kodları aratın;
Kod:
def BINARY_NEW_AddAffect(self, type, pointIdx, value, duration): self.affectShower.BINARY_NEW_AddAffect(type, pointIdx, value, duration) if chr.NEW_AFFECT_DRAGON_SOUL_DECK1 == type or chr.NEW_AFFECT_DRAGON_SOUL_DECK2 == type: self.interface.DragonSoulActivate(type - chr.NEW_AFFECT_DRAGON_SOUL_DECK1) elif chr.NEW_AFFECT_DRAGON_SOUL_QUALIFIED == type: self.BINARY_DragonSoulGiveQuilification()Altına şu kodları ekleyin;
Kod:
elif chr.AFFECT_POISON == type or 209 == type: self.playerGauge.RefreshGuageColor("lime") self.interface.HPPoisonEffectShow() self.interface.PartyPoisonGuageShow()Aynı dosyada şu kodu aratın;
Kod:
def BINARY_NEW_RemoveAffect(self, type, pointIdx): self.affectShower.BINARY_NEW_RemoveAffect(type, pointIdx) if chr.NEW_AFFECT_DRAGON_SOUL_DECK1 == type or chr.NEW_AFFECT_DRAGON_SOUL_DECK2 == type: self.interface.DragonSoulDeactivate()Altına şu kodları ekleyin;
Kod:
elif chr.AFFECT_POISON == type or 209 == type: self.playerGauge.RefreshGuageColor("red") self.interface.HPPoisonEffectHide() self.interface.PartyPoisonGuageHide()Root/interfaceModule.py dosyasını açın ve şu kodları aratın;
Kod:
def RefreshStamina(self): self.wndTaskBar.RefreshStamina()Altına şu kodları ekleyin;
Kod:
def HPPoisonEffectShow(self): self.wndTaskBar.HPPoisonEffectShow() def HPPoisonEffectHide(self): self.wndTaskBar.HPPoisonEffectHide()Aynı dosyada şu kodları aratın;
Kod:
def ChangePartyParameter(self, distributionMode): self.wndParty.ChangePartyParameter(distributionMode)Altına şu kodları ekleyin;
Kod:
def PartyPoisonGuageShow(self): self.wndParty.PartyPoisonGuageShow() def PartyPoisonGuageHide(self): self.wndParty.PartyPoisonGuageHide()Root/uiParty.py dosyasını açın ve PartyMemberInfoBoard sınıfı içindeki şu kodları aratın;
Kod:
def __init__(self): ui.ScriptWindow.__init__(self) self.pid = None self.vid = NoneAltına şu kodu ekleyin;
Kod:
self.poison = 0Aynı dosyada şu kodu aratın;
Kod:
self.gauge = self.GetChild("Gauge")Altına şu kodu ekleyin;
Kod:
self.poisonGauge = self.GetChild("PoisonGauge")Aynı dosyada PartyMemberInfoBoard sınıfı içindeki __LoadBoard() fonksiyonu içindeki şu kodları aratın;
Kod:
self.__SetAffectsMouseEvent() self.__HideAllAffects()Altına şu kodu ekleyin;
Kod:
self.poisonGauge.Hide()Aynı dosyada şu kodları aratın;
Kod:
def SetCharacterHP(self, hpPercentage): hpPercentage = max(0, hpPercentage) self.gauge.SetPercentage(hpPercentage, 100)Altına şu kodları ekleyin;
Kod:
self.poisonGauge.SetPercentage(hpPercentage, 100) def UpdatePoisonGauge(self, arg): self.poison = arg if self.poison == 1: if self.gauge.IsShow(): self.gauge.Hide() self.poisonGauge.Show() else: if self.poisonGauge.IsShow(): self.poisonGauge.Hide() self.gauge.Show()Aynı dosyada şu kodları aratın;
Kod:
def Unlink(self): self.vid = None self.nameTextLine.SetPackedFontColor(self.UNLINK_COLOR) self.gauge.Hide()Altına şu kodları ekleyin;
Kod:
self.poisonGauge.Hide()Aynı dosyada şu kodları aratın;
Kod:
def __FindPartyMemberInfoBoardByPID(self, pid): for board in self.partyMemberInfoBoardList: if pid == board.GetCharacterPID(): return board return NoneAltına şu kodları ekleyin;
Kod:
def __FindPartyMemberInfoBoardByName(self, name): for board in self.partyMemberInfoBoardList: if name == board.GetCharacterName(): return board return NoneAynı dosyada şu kodları aratın;
Kod:
def ChangePartyParameter(self, distributionMode): self.partyMenu.ChangePartyParameter(distributionMode)Altına şu kodları ekleyin;
Kod:
def PartyPoisonGuageShow(self): board = self.__FindPartyMemberInfoBoardByName(player.GetName()) board.UpdatePoisonGauge(1) def PartyPoisonGuageHide(self): board = self.__FindPartyMemberInfoBoardByName(player.GetName()) board.UpdatePoisonGauge(0)Root/uiPlayerGauge.py dosyasını açın ve şu kodları aratın;
Kod:
def DisableShowAlways(self): self.showAlways = False self.RefreshGauge()Altına şu kodları ekleyin;
Kod:
def RefreshGuageColor(self, color): self.MakeGauge(100, color)Root/uiTaskbar.py dosyasını açın ve şu kodları aratın;
Kod:
self.mouseModeButtonList = [ ui.ScriptWindow("TOP_MOST"), ui.ScriptWindow("TOP_MOST") ]Altına şu kodu ekleyin;
Kod:
self.poisonEffect = 0Aynı dosyada şu kodu aratın;
Kod:
self.spRecoveryGaugeBar = self.GetChild("SPRecoveryGaugeBar")Altına şu kodları ekleyin;
Kod:
self.hpPoisonGauge = self.GetChild("HPPoisonGauge") self.hpPoisonRecoveryGaugeBar = self.GetChild("HPPoisonRecoveryGaugeBar") self.hpPoisonGauge.Hide() self.hpPoisonRecoveryGaugeBar.Hide()Aynı dosyada şu kodu aratın;
Kod:
self.spRecoveryGaugeBar = NoneAltına şu kodları ekleyin;
Kod:
self.hpPoisonGauge = None self.hpPoisonRecoveryGaugeBar = None self.poisonEffect = 0Aynı dosyada şu kodları aratın;
Kod:
def RefreshSkill(self): self.curSkillButton.RefreshSkill() for button in self.selectSkillButtonList: button.RefreshSkill()Altına şu kodları ekleyin;
Kod:
def HPPoisonEffectShow(self): self.poisonEffect = 1 self.hpGauge.Hide() self.hpPoisonGauge.Show() def HPPoisonEffectHide(self): self.poisonEffect = 0 self.hpPoisonGauge.Hide() self.hpGauge.Show()Aynı dosyada şu kodları aratın;
Kod:
def SetHP(self, curPoint, recoveryPoint, maxPoint): curPoint = min(curPoint, maxPoint) if maxPoint > 0: self.hpGauge.SetPercentage(curPoint, maxPoint) self.tooltipHP.SetText("%s : %d / %d" % (localeInfo.TASKBAR_HP, curPoint, maxPoint)) if 0 == recoveryPoint: self.hpRecoveryGaugeBar.Hide() else: destPoint = min(maxPoint, curPoint + recoveryPoint) newWidth = int(self.GAUGE_WIDTH * (float(destPoint) / float(maxPoint))) self.hpRecoveryGaugeBar.SetSize(newWidth, self.GAUGE_HEIGHT) self.hpRecoveryGaugeBar.Show()Aşağıdaki kodlarla değiştiriniz;
Kod:
def SetHP(self, curPoint, recoveryPoint, maxPoint): curPoint = min(curPoint, maxPoint) if maxPoint > 0: self.hpGauge.SetPercentage(curPoint, maxPoint) self.hpPoisonGauge.SetPercentage(curPoint, maxPoint) self.tooltipHP.SetText("%s : %d / %d" % (localeInfo.TASKBAR_HP, curPoint, maxPoint)) if 0 == recoveryPoint: self.hpRecoveryGaugeBar.Hide() self.hpPoisonRecoveryGaugeBar.Hide() else: destPoint = min(maxPoint, curPoint + recoveryPoint) newWidth = int(self.GAUGE_WIDTH * (float(destPoint) / float(maxPoint))) if self.poisonEffect == 0: if self.hpPoisonRecoveryGaugeBar.IsShow(): self.hpPoisonRecoveryGaugeBar.Hide() self.hpRecoveryGaugeBar.SetSize(newWidth, self.GAUGE_HEIGHT) self.hpRecoveryGaugeBar.Show() else: if self.hpRecoveryGaugeBar.IsShow(): self.hpRecoveryGaugeBar.Hide() self.hpPoisonRecoveryGaugeBar.SetSize(newWidth, self.GAUGE_HEIGHT) self.hpPoisonRecoveryGaugeBar.Show()Evet arkadaşlar root kısmı bu kadar.
Şimdi uiscript kısmına geçelim.
Not: Lakin burada önemli bir nokta var. uiTasbar.py dosyasında taskbar.py dosyasını locale dosyası üzerinden çektiği için uiscript içindeki taskbar.py yerine locale/tr/ui içindekini düzenlemelisiniz eğer sizin uiTaskbar.py dosyanızda uiscript packından çekiyorsa oradaki dosyayı düzenleyin.
UIScript/taskbar.py veya locale/xx/ui/taskbar.py dosyasını açın ve en alta şu kodları ekleyin;
Kod:
window["children"][1]["children"][2]["children"] = window["children"][1]["children"][2]["children"] + ( { "name" : "HPPoisonRecoveryGaugeBar", "type" : "bar", "x" : 0, "y" : 0, "width" : 95, "height" : 13, "color" : 0x55008000, }, { "name" : "HPPoisonGauge", "type" : "ani_image", "x" : 0, "y" : 0, "delay" : 6, "images" : ( "D:/Ymir Work/UI/Pattern/HPPoisonGauge/01.tga", "D:/Ymir Work/UI/Pattern/HPPoisonGauge/02.tga", "D:/Ymir Work/UI/Pattern/HPPoisonGauge/03.tga", "D:/Ymir Work/UI/Pattern/HPPoisonGauge/04.tga", "D:/Ymir Work/UI/Pattern/HPPoisonGauge/05.tga", "D:/Ymir Work/UI/Pattern/HPPoisonGauge/06.tga", "D:/Ymir Work/UI/Pattern/HPPoisonGauge/07.tga", ), },)@sau feng tarafından bildirilen bir sorunun çözümü. Çözüm için teşekkürler.
Not: Yukarıdaki uiscript kodu bazı filesler uyumsuz olduğu için şu hatayı alıyorsanız;
Kod:
0404 20:35:20028 :: File "game.py", line 766, in BINARY_NEW_AddAffect 0404 20:35:20028 :: File "interfaceModule.py", line 729, in PartyPoisonGuageShow 0404 20:35:20028 :: File "uiParty.py", line 758, in PartyPoisonGuageShow 0404 20:35:20029 :: AttributeError 0404 20:35:20029 :: : 0404 20:35:20029 :: 'NoneType' object has no attribute 'UpdatePoisonGauge' 0404 20:35:20029 ::Şu kodları aratın;
Kod:
{ "name" : "HPGauge", "type" : "ani_image", "x" : 0, "y" : 0, "delay" : 6, "images" : ( "D:/Ymir Work/UI/Pattern/HPGauge/01.tga", "D:/Ymir Work/UI/Pattern/HPGauge/02.tga", "D:/Ymir Work/UI/Pattern/HPGauge/03.tga", "D:/Ymir Work/UI/Pattern/HPGauge/04.tga", "D:/Ymir Work/UI/Pattern/HPGauge/05.tga", "D:/Ymir Work/UI/Pattern/HPGauge/06.tga", "D:/Ymir Work/UI/Pattern/HPGauge/07.tga", ), },Altına ekleyin;
Kod:
{ "name" : "HPPoisonRecoveryGaugeBar", "type" : "bar", "x" : 0, "y" : 0, "width" : 95, "height" : 13, "color" : 0x55008000, }, { "name" : "HPPoisonGauge", "type" : "ani_image", "x" : 0, "y" : 0, "delay" : 6, "images" : ( "D:/Ymir Work/UI/Pattern/HPPoisonGauge/01.tga", "D:/Ymir Work/UI/Pattern/HPPoisonGauge/02.tga", "D:/Ymir Work/UI/Pattern/HPPoisonGauge/03.tga", "D:/Ymir Work/UI/Pattern/HPPoisonGauge/04.tga", "D:/Ymir Work/UI/Pattern/HPPoisonGauge/05.tga", "D:/Ymir Work/UI/Pattern/HPPoisonGauge/06.tga", "D:/Ymir Work/UI/Pattern/HPPoisonGauge/07.tga", ), },Evet arkadaşlar sistem bu şekildedir. Anlayabilmeniz için hazır kod vermiyorum.
Sistem için gerekli görseller ekteki dosyayı indirerek edinebilirsiniz.
Bu yüzden ekten verdiğim dosyayı indirip Client/ETC içindeki ymir work klasörünü oyununuzun ETC içine atın.
Not: Ekteki dosyanın içinde de anlatım mevcuttur. Konuda kodları eklerken tab ayarlarını filan düzgün yaptım. Gene de emin olmak için ekteki dosyanın anlatımını da kullanabilirsiniz.
Şimdiden herkese hayırlı olsun.
Burada diğer forum sitelerin bağlantısının paylaşılması yasak olduğu için dosyayı şuraya yükledim;
Ziyaretçiler için gizlenmiş link,görmek için üye olmalısınız!
Giriş yap veya üye ol.
Virüs total:
Ziyaretçiler için gizlenmiş link,görmek için üye olmalısınız!
Giriş yap veya üye ol.
Casro2 Poison Gauge Sistemi Nedir?
Metin2 özel sunucularında sunucu sahipleri ve geliştiricileri tarafından sunulan yenilikçi sistemlerden birisi olan Casro2 Poison Gauge Sistemi, oyuncuların karakterlerinin PvP mücadelelerinde daha stratejik ve dengeli bir deneyim yaşamalarını sağlar. Bu sistem, özellikle Metin2 geliştirme nişi içerisinde dikkat çeken bir özelliktir ve C++ tabanlı sunucu yapıları üzerinde geliştirilerek entegre edilir. Casro2 Poison Gauge, karakterlerin zehirlenme seviyesini görsel olarak takip edebilmelerini sağlayan bir sayaçtır. Bu sayaç sayesinde oyuncular, karşı rakibin zehir seviyesini izleyebilir ve bu bilgiye göre savaş stratejileri geliştirebilirler.
Casro2 Poison Gauge Nasıl Çalışır?
Casro2 Poison Gauge sistemi, oyuncunun karakteri bir rakibe karşı zehir saldırısı gerçekleştirdiğinde devreye girer. Zehir saldırısı sonucunda karşı rakip karakterin üzerinde bir sayaç belirir ve bu sayaç, alınan zehir miktarını ve süresini gösterir. Bu sayaç, genellikle ekranın sol üst köşesinde ya da karakterin can çubuğunun altında yer alır. Sistem, Python GUI (PyUI) tabanlı arayüzle entegre çalışarak kullanıcı dostu bir yapı sunar. Ayrıca, poison gauge değerlerine göre karakterlerin can kaybı, hız düşmesi gibi etkileri dinamik olarak hesaplanır. Bu da oyuncuların PvP savaşlarında daha dikkatli ve stratejik hareket etmelerini teşvik eder.
Casro2 Poison Gauge Sisteminin Avantajları
Casro2 Poison Gauge sisteminin en büyük avantajlarından birisi, PvP deneyimini daha derin ve taktiksel hale getirmesidir. Oyuncular, zehir seviyesini takip ederek hangi an saldırı yapması gerektiğini ya da kaçınması gerektiğini bilebilirler. Ayrıca, bu sistem sayesinde karakterlerin poison dayanıklılığı gibi yeni özellikler ön plana çıkar. Bu da Metin2 özel sunucularında karakter geliştirme sürecini daha zenginleştirir. Sunucu sahipleri, bu sistemi kullanarak oyuncuların ilgisini çekmeyi başarırlar. Özellikle C++ ile yazılmış sunucu kaynak kodları üzerinde bu sistem kolayca entegre edilebilir ve özelleştirilebilir.
Sistem Entegrasyonu ve Kurulum
Casro2 Poison Gauge sistemi, Metin2 özel sunucularında aktif hale getirilmek istendiğinde bazı önemli adımlar izlenmelidir. İlk olarak, game server source code üzerinde gerekli değişiklikler yapılmalıdır. Bu değişiklikler, poison gauge değerlerinin sunucudan istemciye aktarılmasını sağlar. Ardından, Python tabanlı UI dosyaları (uiscript) üzerinde sayaç tasarımı yapılır. Bu tasarım, oyuncunun PvP sırasında poison seviyesini kolayca takip edebilmesini sağlar. Pack dosyaları güncellenerek bu yeni arayüz sunucuya entegre edilir. Tüm bu işlemler, Metin2 geliştirme konusunda deneyimli geliştiriciler tarafından kolayca uygulanabilir.
Sonuç
Casro2 Poison Gauge sistemi, Metin2 özel sunucularında PvP odaklı oyun deneyimini ciddi anlamda geliştirir. Oyuncuların strateji geliştirmesi, rakiplerini analiz etmesi ve daha akıllıca savaşması için güçlü bir araçtır. Bu sistem, C++ ve Python tabanlı sunucu geliştirme bilgisiyle kolayca entegre edilebilir. Casro2 Poison Gauge sistemi, Metin2 özel sunucularında farklılaştırıcı bir özellik sunarak hem oyuncuların hem de sunucu sahiplerinin memnuniyetini artırır.
What is Casro2 Poison Gauge System?
The Casro2 Poison Gauge System is one of the innovative features offered by server owners and developers in Metin2 private servers, enhancing strategic and balanced gameplay in PvP encounters. This system stands out in the Metin2 development niche and is implemented through C++ based server structures. Casro2 Poison Gauge is a visual counter that allows players to track their character's poisoning level. With this gauge, players can monitor the poison level of their opponent and develop battle strategies accordingly.
How Does Casro2 Poison Gauge Work?
The Casro2 Poison Gauge system activates when a player's character inflicts a poison attack on an opponent. As a result of the poison attack, a counter appears over the enemy character, showing the amount and duration of poison received. This gauge usually appears in the top-left corner of the screen or below the character's health bar. The system works integrated with a Python-based GUI (PyUI), providing a user-friendly interface. Additionally, effects such as health loss and speed reduction are dynamically calculated based on poison gauge values, encouraging players to act more strategically during PvP battles.
Advantages of Casro2 Poison Gauge System
One of the biggest advantages of the Casro2 Poison Gauge system is its ability to make the PvP experience deeper and more tactical. Players can monitor poison levels to decide when to attack or retreat. Moreover, features like poison resistance become prominent, enriching the character development process in Metin2 private servers. Server owners successfully attract player interest by implementing this system. It can be easily integrated and customized into C++ based server source codes.
System Integration and Installation
To activate the Casro2 Poison Gauge system in Metin2 private servers, several key steps must be followed. First, necessary modifications should be made in the game server source code to allow poison gauge values to be transferred from the server to the client. Then, UI files based on Python (uiscript) are designed to display the gauge visually. This design enables easy tracking of poison levels during PvP combat. Updated pack files integrate this new interface into the server. All these processes can be easily applied by experienced developers in Metin2 development.
Conclusion
The Casro2 Poison Gauge system significantly enhances the PvP-focused gaming experience in Metin2 private servers. It serves as a powerful tool for players to develop strategies, analyze opponents, and fight smarter. Implemented with C++ and Python-based server development knowledge, this system provides a differentiating feature in Metin2 private servers, increasing satisfaction among both players and server owners.
